Today, I would like to share how to set up Jetson Nano.
Reference: Nvidia Site
https://developer.nvidia.com/embedded/learn/get-started-jetson-nano-devkit#intro
Here is pre-requisite materials.
1. A micro-SD card (minimum 16GB / Recommended >32GB)
2. Power supply
3. An ethernet cable
4. Keyboard and Mouse (USB Type)
Step1. Download SD Card Image zip file.
1-1. Go to the https://developer.nvidia.com/embedded/learn/get-started-jetson-nano-devkit#write
Getting Started With Jetson Nano Developer Kit
The NVIDIA® Jetson Nano™ Developer Kit is a small AI computer for makers, learners, and developers. After following along with this brief guide, you’ll be ready to start building practical AI applications, cool AI robots, and more.
developer.nvidia.com
1-2. Download the Jetson Nano Developer Kit SD Card Image

Step2. Setting Environment to write image to the microSD Card
2-1. Click INSTRUCTIONS FOR WINDOWS and download "SD Memory Card Formatter for Windows".
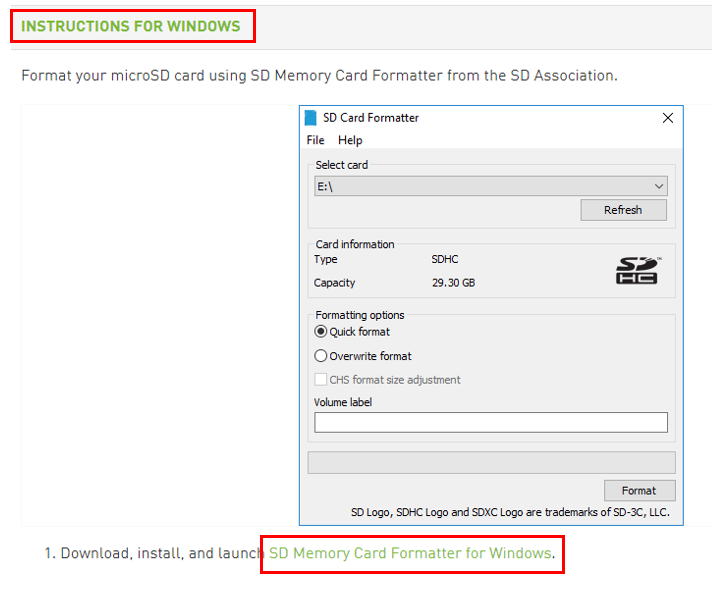
2-2. After Download, Install and launch SD Card Formatter.
2-3. Choose SD Card directory on "Select card" section.
2-4. Choose "Quick format" on Formatting options section.
2-5. Leave as blank on "Volume label"
2-6. Click on "Format" button and if message box appears, click "Yes".
2-7. Download "Etcher", install and launch.

2-8. Click on "Select Image" and choose "Jetson Nano Developer Kit SD Card Image Zip" file downloaded on Step1.
2-9. Click on "Select drive" and choose SD card directory.
2-10. Click on "Flash!" and it will start write image to the microSD Card. It will take few minutes.
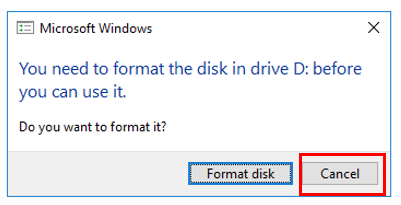
2-11. After flash, remove SD Card from computer.
* If the message box appears, click "Cancel".
Step3. Jetson Nano Hardware Setup.
3-1. Connect keyboard / mouse / power cable / HDMI cable / ethernet cable / and SD Card to Jetson Nano as shown in below.

3-2. When power is connected, Jetson Nano automatically boots up.
3-3. When it is sucessfully booted, Monitor will be displayed as shown below.

* If ethernet cable is not connected, Jetson nano won't be booted up.
* There are two types of power supply which are microUSB and DC Power. For stable use, DC Power Supply is recommended because Jetson Nano is defaultly set with 10W power consumption.


* To use DC Power Supply, you should enable DC Barrel jack by using jumper socket as shown in figure below.

'NVIDIA Jetson' 카테고리의 다른 글
| Jetson Nano Visual Studio Code & Arduino install Guide (2) | 2021.05.12 |
|---|---|
| YOLOv4 on NVIDIA Jetson Nano (0) | 2021.05.10 |
| Jetson Inference Using OpenCV (0) | 2019.11.05 |


